How to Color a Cat – Easy Step-by-Step Guide for Kids
You know what? I still remember the first time I tried to color a cat. I was about seven years old, sitting at my grandmother’s kitchen table with a box of crayons and a coloring page. I made that poor cat bright purple with green stripes! My grandmother hung it on her fridge anyway and told me it was beautiful. Looking back now, I realize she was teaching me something important – there’s no wrong way to color, especially when you’re learning.
However, over the years, I’ve picked up some really helpful tricks that make coloring cats look more realistic and fun. Today, I want to share everything I’ve learned with you. Whether you’re five years old or fifty, these tips will help you create beautiful cat pictures that you’ll be proud to hang on any fridge!
Why Cats Are Fun to Color
Cats are one of my favorite animals to color, and I think you’ll love them too! First of all, cats come in so many different colors – orange, black, white, gray, brown, and even mixed patterns like calico and tabby. This means you get to use lots of different crayons or colored pencils in one picture.
Moreover, cats have really interesting features to color. Those big eyes that seem to glow, the soft fluffy fur, the cute pink nose, and those long whiskers – each part is like a little puzzle that’s fun to figure out. Plus, when you’re done, you have this adorable cat looking back at you from the paper!
I’ve colored hundreds of cats over the years (yes, really!), and I still get excited every time I start a new one. There’s something magical about watching a simple black and white outline turn into a colorful, living-looking cat.
What You’ll Need to Color Your Cat
Before we start coloring, let’s talk about what works best. Now, I’m not saying you need fancy expensive supplies – remember, I started with a basic box of crayons! However, having the right tools does make things easier.
For Younger Kids (Ages 3-7):
Chunky crayons are perfect when you’re just starting out. They’re easy to hold, they don’t break easily even when you press hard, and they come in bright, fun colors. I recommend washable crayons too, because let’s be honest – sometimes the coloring happens on the table instead of just the paper! (Don’t worry, we’ve all been there.)
For Older Kids and Adults:
Colored pencils give you more control and let you create really beautiful effects. You can press lightly for soft colors or press harder for darker shades. I keep a set of 24 colored pencils just for coloring cats because I use them so much!
Markers are another great option, especially if you like bright, bold colors. Just be careful – they can bleed through thin paper, so you might want to put an extra sheet underneath your coloring page.
My Personal Favorite:
I usually start with colored pencils and then use a white gel pen at the end to add sparkly highlights. This makes the cat’s eyes look shiny and adds little touches of light to the fur. It’s like magic!
Choosing Colors for Your Cat
This is where it gets really fun! You can make your cat any color you want, but let me share some color combinations that look especially good.
Orange and Ginger Cats
Orange cats are super popular, and they’re pretty easy to color. I use a light orange or peach color for most of the body, then add some darker orange for stripes or shading. Here’s a trick I learned – real orange cats usually have some white on their chest and paws. Adding that little bit of white makes your cat look more realistic.
One time, my neighbor’s orange cat sat in my window while I was coloring, and I got to copy his exact colors! That’s actually a fun thing to do – if you see a cat you like, try to remember what colors it has and use those in your picture.
Black Cats
Now, you might think black cats are the easiest to color – just use black, right? Well, not exactly! If you use only solid black, your cat looks flat, like a silhouette. Instead, try this: color most of the cat with black, but use dark gray in some spots to show where light hits the fur. This gives your cat shape and makes it look fluffy and real.
I also like to add just a tiny bit of dark blue or purple mixed with the black. It sounds weird, but trust me – it makes the black look richer and more interesting!
White Cats
Here’s something that surprised me when I first learned it – white cats aren’t actually pure white in pictures! If you leave the paper completely white with no coloring, your cat looks unfinished. Instead, use a very light gray colored pencil to add soft shadows under the chin, under the belly, and behind the legs.
Moreover, you can add a tiny bit of cream or very light yellow in some spots. This makes your white cat look soft and fluffy instead of flat. Think about where shadows would naturally be – under the cat’s body, in the folds of fur, and around the paws.
Tabby Cats (Cats with Stripes)
Tabby cats are my absolute favorite to color! They have these cool stripe patterns that are really fun to make. Start by coloring the whole cat with a light brown or light gray. Then, use a darker color to add stripes.
Here’s the secret to good stripes – they shouldn’t be perfectly straight and even. Real cat stripes are a bit wavy and irregular. I learned this by watching my friend’s tabby cat very carefully. Some stripes are thick, some are thin, and they curve around the cat’s body.
Calico Cats (Patches of Colors)
Calico cats are like painting with patches! They have spots of orange, black, and white all mixed together. When I color calico cats, I don’t worry too much about making it perfect. The fun part is putting the colors wherever you want!
However, here’s a little tip – real calico cats usually have more white than other colors. So maybe make about half your cat white, then add patches of orange and black in the other areas. Leave some white space between the color patches too.
Siamese Cats
Siamese cats have a really cool coloring pattern. Their bodies are light cream or beige, but their ears, face, paws, and tail are dark brown. It’s called “point coloring” which sounds fancy, but it’s actually pretty easy to do.
I color the whole body very lightly with cream or tan, then go back and color the points darker. The fun part is making the dark areas blend smoothly into the light areas – it takes a little practice, but it looks really neat when you get it right!
Step-by-Step: Coloring Your Cat
Okay, now let’s actually color a cat from start to finish! I’m going to walk you through exactly what I do, step by step.
Step 1: Look at Your Cat Picture
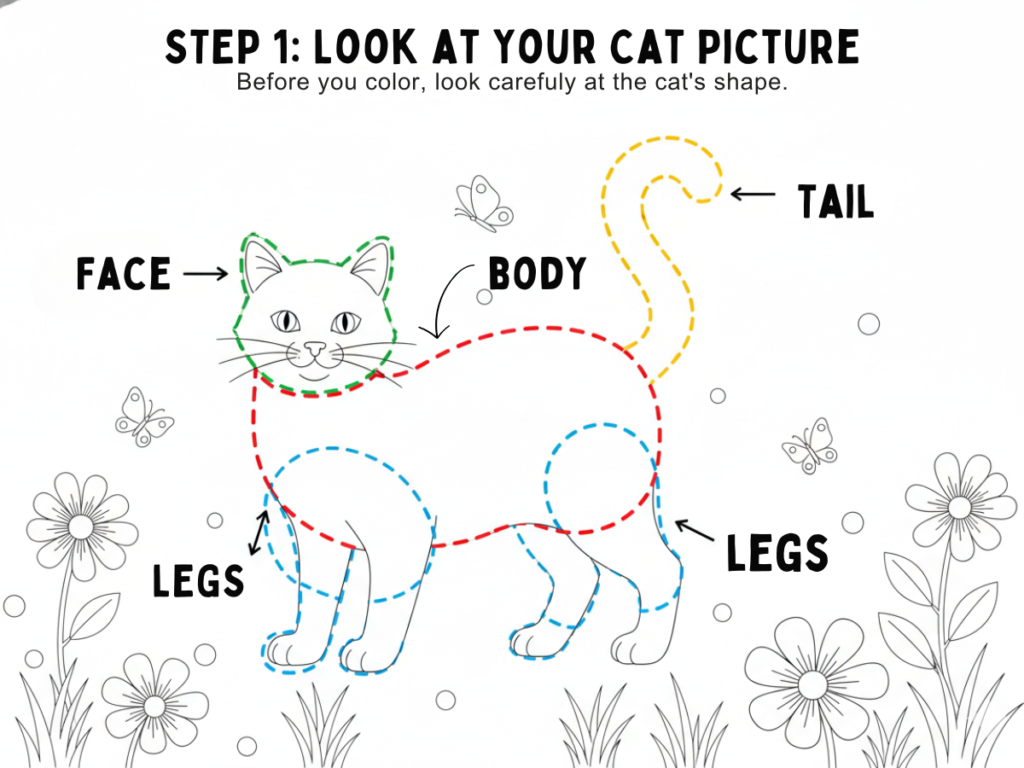
Before you color anything, just look at the picture for a minute. Where is the cat’s body? Where are the legs, the head, the tail? I know this sounds obvious, but I’ve seen kids (and adults!) accidentally color the background where the cat’s body should be because they didn’t look first!
Step 2: Choose Your Main Color
Pick the main color for your cat. This is the color that will cover most of the body. Let’s say you picked orange because you want an orange tabby cat. Great choice!
Step 3: Color the Body
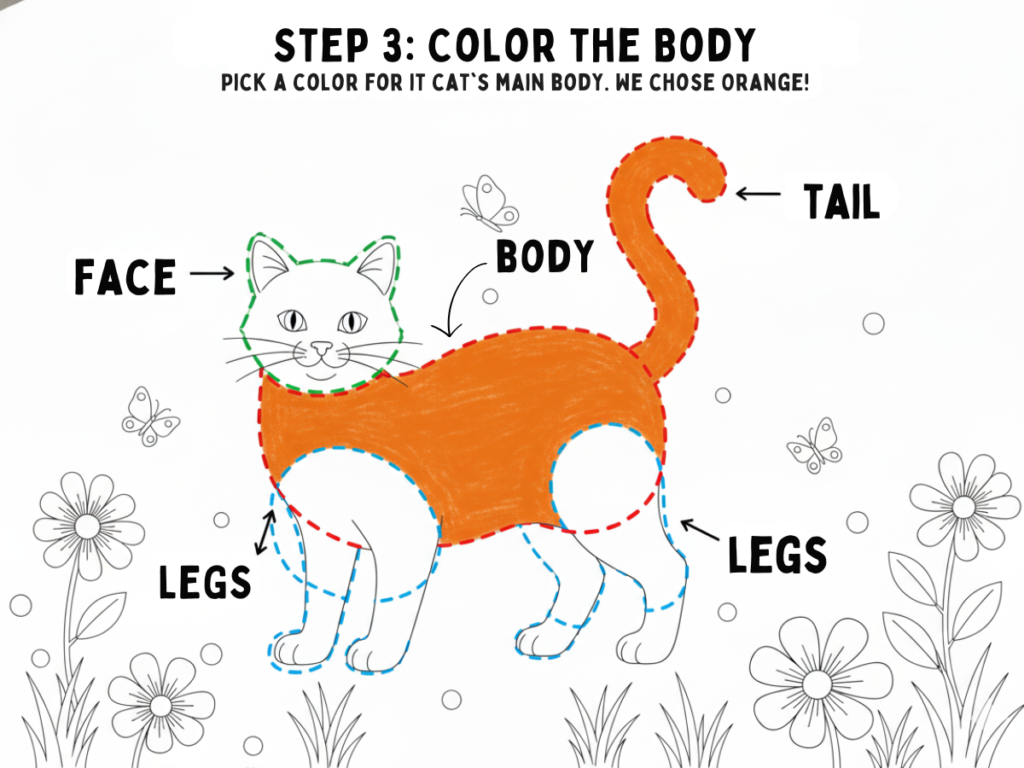
Start coloring the cat’s body with your main color. Here’s a tip I learned the hard way – color in the same direction that the fur would grow. For a cat, that usually means coloring from the head toward the tail, and from the back down toward the belly.
Moreover, don’t press too hard yet! Start with light pressure. You can always make it darker, but it’s really hard to make it lighter once you’ve pressed hard.
Step 4: Add Details and Patterns
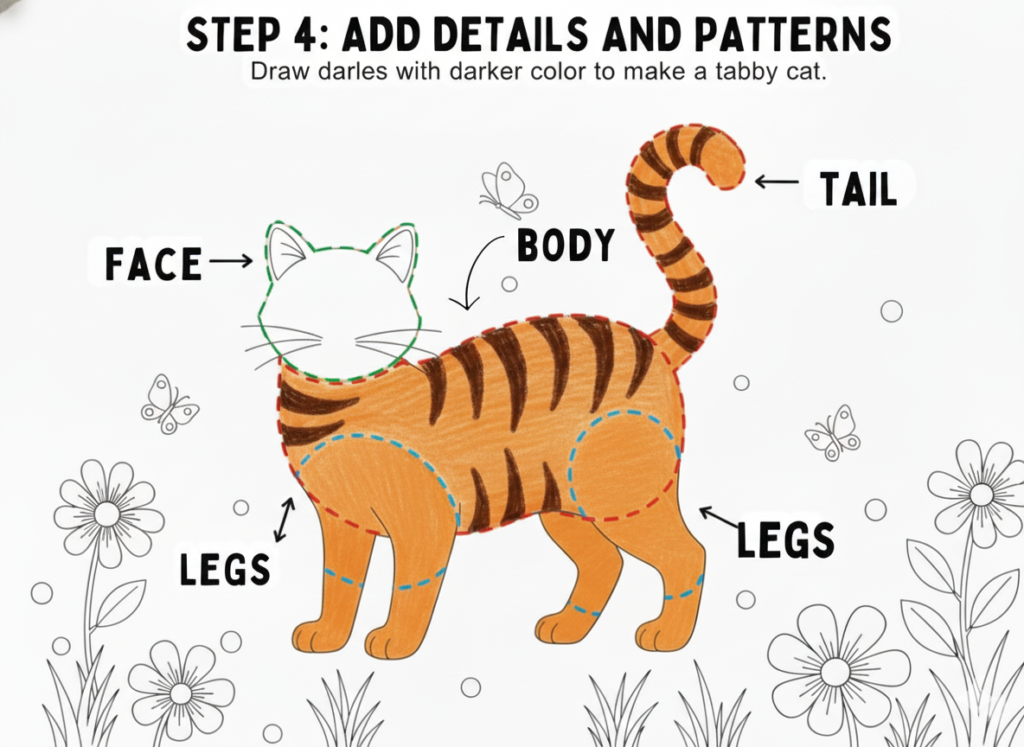
Now comes the fun part! If you’re making a tabby cat, add those stripes with a darker color. If you’re making a calico, add your patches of color. Take your time with this – there’s no rush!
I usually put on some music while I color. It helps me relax and not worry about making everything perfect. Remember, even real cats don’t have perfectly even stripes!
Step 5: Do the Face
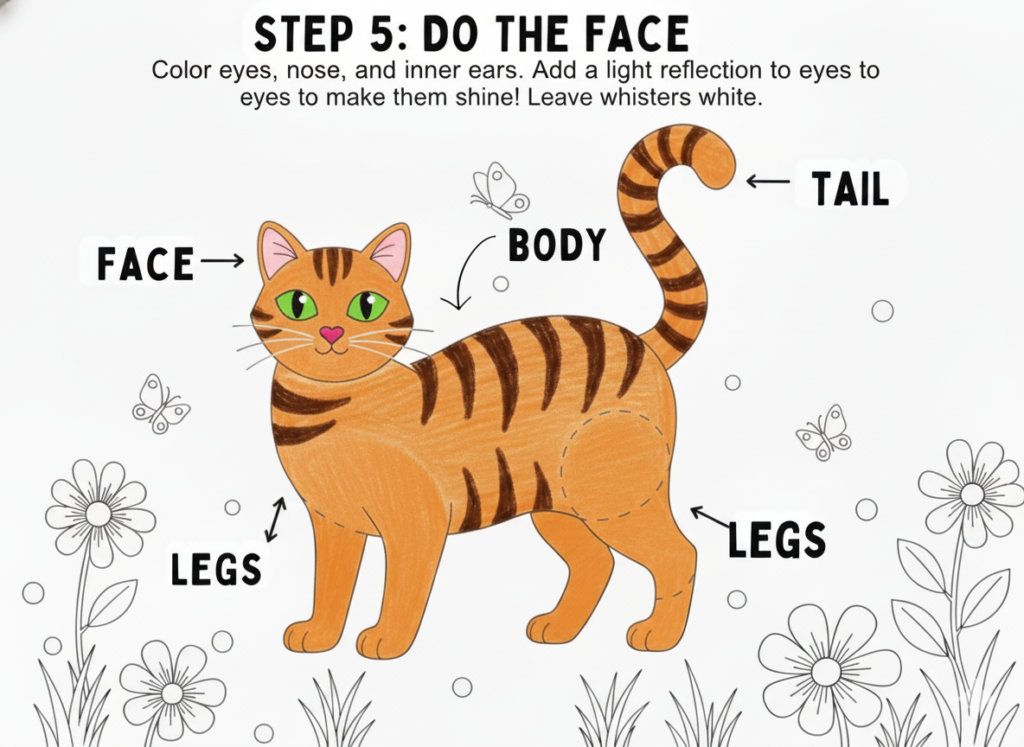
The face is my favorite part to color. Let’s break it down:
Eyes: Cat eyes are amazing! I usually color them green, gold, blue, or amber. Here’s the trick – don’t color the whole eye the same color. Leave a tiny white circle in each eye uncolored (or color it white if you’re using markers). This is the light reflection, and it makes the eyes look shiny and alive. Trust me, this one little detail makes a huge difference!
Nose: Cat noses are usually pink, brown, or black. I color mine pink most of the time because I think it looks cute. Color it solid – no need for fancy shading here.
Whiskers: Wait, don’t color the whiskers! Leave them white (just the paper), or if you’re using a black cat on white paper, you can draw them in white at the end with a white crayon or gel pen. Whiskers should be thin and delicate.
Step 6: Add Shading
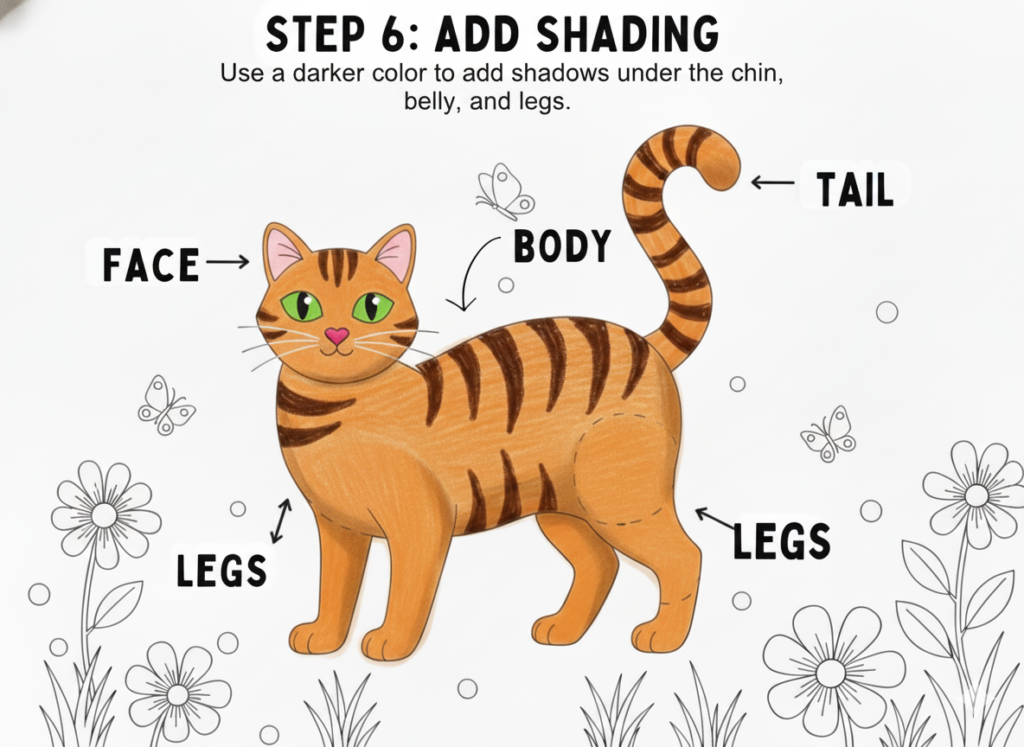
This step is optional, but it really makes your cat look three-dimensional! Take a darker version of your main color (so if your cat is orange, use dark orange or brown) and lightly color these areas:
- Under the chin
- Under the belly
- Behind the legs
- Around the paws
- Behind the ears
You’re basically coloring where shadows would naturally fall. I learned this by looking at real cats and noticing where they looked darker.
Step 7: Color the Background (Optional)
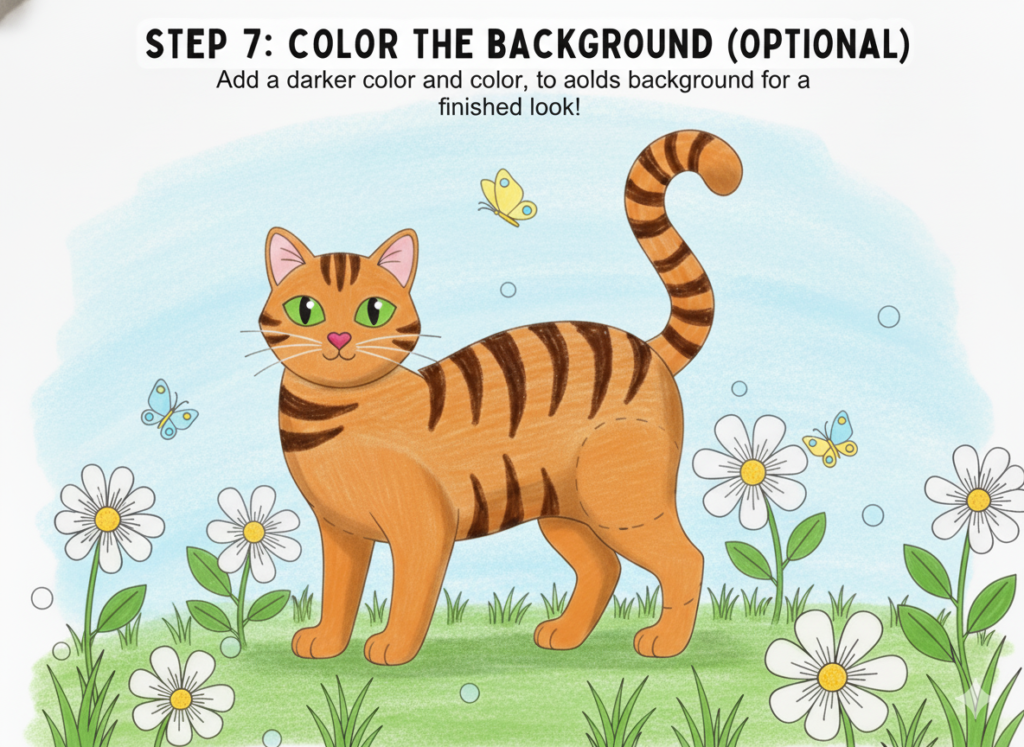
Sometimes I like to add a simple background to my cat pictures. Nothing fancy – maybe some grass at the bottom if the cat is sitting outside, or a simple solid color behind the cat. However, you don’t have to do this! A white background is perfectly fine too.
Common Mistakes (And How to Fix Them)
Let me tell you about some mistakes I’ve made so you can avoid them!
Mistake 1: Pressing Too Hard Right Away
I used to press really hard with my crayons from the start. The problem is, you can’t really erase or lighten crayon once it’s on thick! Now I always start light and build up to darker colors.
Mistake 2: Using Only One Color
Even if you’re coloring an orange cat, don’t use only one shade of orange. Use light orange, medium orange, and dark orange. This makes your cat look round and real instead of flat.
Mistake 3: Forgetting About the Eyes
Those little white circles in the eyes really matter! I can’t tell you how many cats I colored without them before I learned this trick. Once you add those eye highlights, everyone will ask you how you made your cat look so good!
Mistake 4: Coloring Outside the Lines
Look, we all color outside the lines sometimes, and that’s okay! However, if you want to stay inside the lines, try coloring very carefully around the edges first, then filling in the middle. Go slow around the outline – you can speed up when you’re coloring the inside parts.
Fun Variations to Try
Once you’ve colored a few basic cats, you can try some fun creative ideas!
Rainbow Cats: Make each stripe of your tabby cat a different color of the rainbow. It sounds wild, but it’s actually really pretty!
Galaxy Cats: Color your cat dark blue or purple, then add little white dots for stars. I made one of these and my little cousin went absolutely crazy over it!
Seasonal Cats: Give your cat seasonal colors – orange and brown for fall, red and green for Christmas, pink and red for Valentine’s Day.
Patterned Cats: Instead of regular fur, give your cat polka dots, hearts, flowers, or geometric patterns. Let your imagination go wild!
Practice Makes Better (Not Perfect!)
Here’s something important I want you to remember – you don’t have to make perfect cats. I’ve been coloring cats for years, and I still make ones I don’t love sometimes. That’s totally normal!
However, each cat you color teaches you something new. Maybe you’ll discover you really like coloring whiskers, or maybe you’ll figure out a new way to make stripes look cool. Every single cat picture is practice for the next one.
I keep all my cat coloring pages in a folder, even the ones from when I was little. It’s really fun to look back and see how much I’ve improved. You should do the same! Date your pictures and keep them – you’ll be amazed at your progress.
Where to Find Cat Pictures to Color
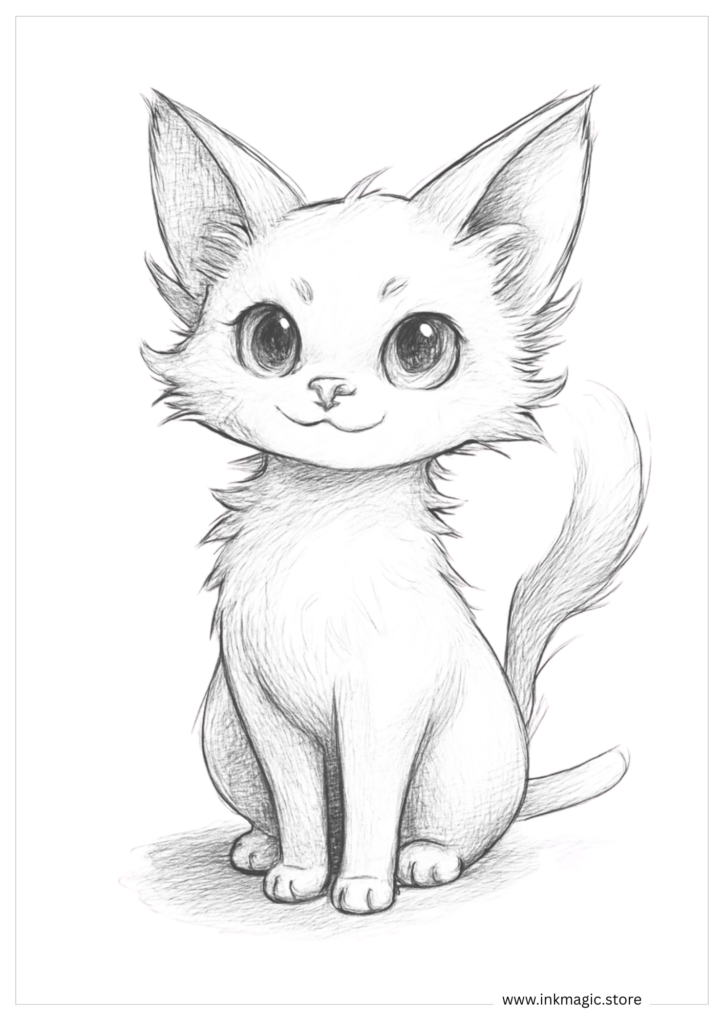
Cat Coloring Pages If you’re looking for more cats to practice on, I have tons of free options for you! Check out our collection of cat coloring pages where you’ll find simple cats perfect for beginners, plus more detailed ones when you’re ready for a challenge. We have sleeping cats, playing cats, cats with different patterns – everything you could want!
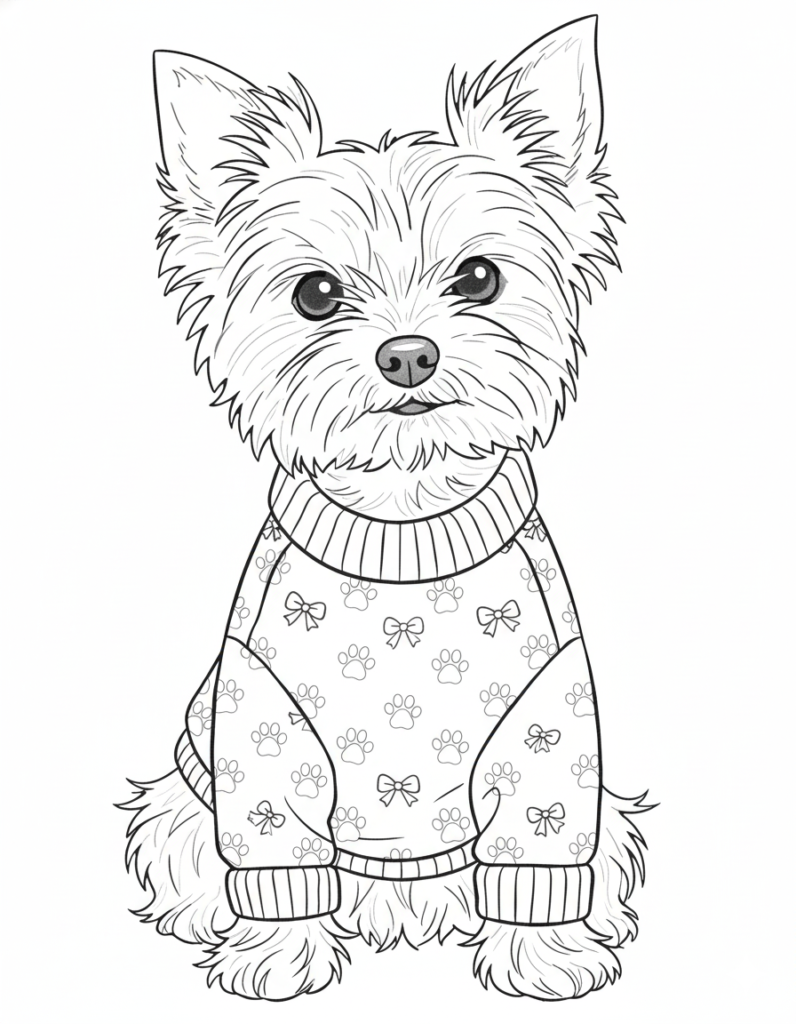
Moreover, if you love animals in general, browse through our animal coloring pages section. You can practice your coloring skills on dogs, elephants, rabbits, and tons of other creatures. The techniques you learn from coloring cats work great on other animals too!
My Final Thoughts
Coloring cats has brought me so much joy over the years. There’s something really peaceful and fun about sitting down with some coloring tools and a cat picture, putting on music or a podcast, and just creating something beautiful.
Remember, every artist started somewhere. That purple cat with green stripes I made when I was seven? My grandmother kept it on her fridge for two whole years. She saw past the “wrong” colors and appreciated that I was creating something, learning something, and having fun.
That’s what I want for you too. Don’t worry about making your cat look exactly like a photograph. Just enjoy the process of choosing colors, filling in the spaces, and watching your cat come to life on the page. Some days your cats will turn out exactly how you imagined, and some days they won’t – and that’s absolutely okay.
The most important thing is that you’re doing something creative, practicing a skill, and hopefully having a really good time. So grab your coloring tools, pick out a cat picture, and let’s make something beautiful together!
Happy coloring! 🐱
What’s the difference between coloring a black cat and other colors?
Black cats need special attention because solid black looks flat. Use dark gray to show where light hits the fur – usually on the top of the head, back, and shoulders. You can even mix in tiny bits of dark blue or purple with your black to make it richer and more interesting.
How do I add shading to make my cat look 3D?
Use a darker version of your main color and lightly shade these areas: under the chin, under the belly, behind the legs, around the paws, and behind the ears. These are naturally shadowy spots on real cats. Start light and build up gradually – you can always add more color, but it’s hard to remove it!
Can I make my cat any color I want?
Absolutely! While orange, black, white, gray, and brown are realistic cat colors, you can make rainbow cats, galaxy cats, purple cats, or cats in any colors you love. There’s no wrong way to be creative with coloring! Some of the most fun cat pictures use completely imaginary colors.
How do I color tabby cat stripes?
Start with a light brown or gray base color for the whole cat. Then use a darker color to add stripes. Make stripes slightly wavy and irregular – not perfectly straight. Real cat stripes vary in thickness and curve around the body. Some stripes can be thick, some thin, and they don’t have to be perfectly spaced.
What coloring tools work best for cats?
Chunky crayons are perfect for younger kids (ages 3-7) because they’re easy to hold and don’t break easily. Colored pencils work great for older kids and adults because you can control shading better and layer colors. Markers give bright, bold colors but may bleed through thin paper, so use an extra sheet underneath.
No! Leave whiskers white (just the paper color), or draw them in white at the end with a white crayon or gel pen. Whiskers should be thin, delicate lines – not colored in solid. Real cat whiskers are very fine and catch the light, so keeping them light colored looks most realistic.
How do you make cat eyes look realistic?
Color the eyes green, gold, blue, or amber. The secret is leaving a small white circle uncolored in each eye – this is the light reflection that makes eyes look shiny and alive. This one detail makes a huge difference! Position the white circle in the same spot on both eyes for the best effect.
What colors should I use for a realistic cat?
Popular realistic cat colors include orange (for tabby cats), black with gray shading, white with light gray shadows, or brown with darker stripes. Real cats rarely have solid colors – adding shading makes them look three-dimensional. You can also try calico patterns with orange, black, and white patches, or cream with brown points for Siamese cats.
What is the easiest way to color a cat?
Start with a simple cat outline and use one main color for the body. Color lightly at first, then add darker shading under the chin, belly, and legs. Don’t forget to leave tiny white circles in the eyes for sparkle! This makes your cat look alive and three-dimensional.